The Final Wash
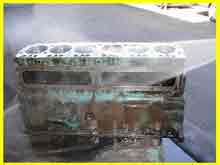
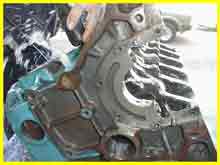
Pre-washing block
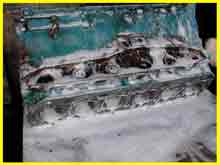
Hot soapy block wash
Thorough wash of webbing
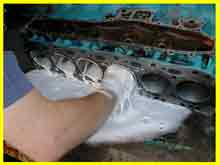
Hot soapy bore wash
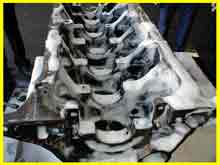
Final washing oil galleries

Cleaning oil galleries
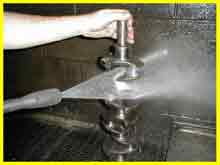
Final washing crankshaft
The first principal requires the assembler to understand that engine reconditioners or machinists don’t final wash their machine work. Even if your machinist or reconditioner delivers your machine work wrapped in plastic, looking clean as a whistle, unless it’s assembled it has not been final washed. So the first assembly procedure is to final wash all the components that have been re-machined or are to be reused. The final wash procedure is very important and some principals and understanding is required to carry out this simple task to an acceptable level.
Firstly I will start with specific components.
The cylinder head…… most reconditioners dry bead blast their heads while some wet blast. The latter appears to produce less damage and stress to threads and cam tunnels etc. but both are acceptable methods of pre-cleaning. If the reconditioner did not remove the welsh plugs, oil gallery plugs or bypass valves these must be removed before final washing. All threads must be re-tapped and blown out. The oil gallery must be brushed and washed out. Suitable oil gallery brushes are available. Special attention must be given to cavities on the top of the head where glass bead is compacted with oil sludge. The spark plug seating area is another place a build up must be loosened or removed prior to final washing. I recommend a spin in a hot parts washer prior to the final wash.(if available) Final washing of the head and it’s components is recommended in clean kero or solvent. A little degreaser added to the solvent will ensure a better final wash. Use a big volume of water ensuring the water jackets, threads and oil passages are thoroughly flushed. Blow out all areas with compressed air giving individual attention to each threaded hole and oil gallery. If any dirt or glass bead is evident at any point when air drying the head, re- wash the head.
The block……the block has undergone a different machining procedure and requires a different final wash procedure. Again the welch plugs and oil gallery plugs have to be removed if they are not already. All threads must be tapped and checked. This also means the alternator and any accessory threaded hole. All oil galleries to be thoroughly brushed out. Usually the reconditioner has hot tanked the block (cast iron) so ensure all loose scale in the water jacket is removed. Again it is recommended that the block is put through the hot parts washer if available. Wash the block in solvent with a little degreaser. Pressure wash the water jackets and check for any welch plugs that may have been pushed into the water jacket at the time of dismantling. Now that the block is clean of oil and solvent it is time to clean the bore. The cylinder bores have to be treated differently to any other component as they must be final washed in hot, soapy water. This process is best achieved using a soft brush.(bottle type brush). The reason for using hot soapy water is that no other method removes the abrasive residue left in the hone finish on a cylinder bore. Some times the bore has to be washed several times before an acceptable standard is achieved. The method of checking this standard is to rub a clean oiled white rag up all the bores. The rag must have no trace of black hone residue before the bore can be called clean. Another area that is mistakenly neglected is the inside of the crankcase area. this area is very rough cast finished and tends to trap the honing abrasive residue. This area should also be rechecked with the white rag test to ensure a complete clean. Again the block should be blown off with air giving special attention to the tapped threads. All machined surfaces should be protected from surface rust by the application of a rust inhibitor.(e.g. RP7)
The crankshaft…… the reconditioner usually hot tanks the shaft prior to grinding so the outside of the shaft is reasonably clean. The preservative has to be removed from the journals. The best way to clean a reground crank is in a kero bath using a gallery brush to clean all drillings. Some cranks have removable oil gallery plugs, so where practicable remove to ensure no rubbish is trapped against the plug. Other cranks have aluminum gallery plugs so check they have not been damaged. (caustic hot tanks will damage these alloy plugs) The flywheel mounting boss often has to be buffed or cleaned with emery tape, as it can be rusty and overlooked by the reconditioner. The front snout may also require attention. Check that the old spigot is removed and all threads and keyways are serviceable. Inspect the oil gallery drillings and ensure they are correctly chambered. Carry out these operations before completing the final wash. Pressure wash and air dry. Spray the shaft with rust inhibitor to protect the ground journals. Care has to be taken to protect the machined surfaces at all times. Make a close inspection of the journals in case some accidental damage has occurred after grinding or linishing. If a journal has to be re-linished due to damage rewash crank again.
: Every care has been taken in writing this information and procedures, but no responsibility can be excepted for errors, omissions or misuse of this information and procedures. The information available on this site is for your instruction only and cannot be copied for sale, © copyright 2020 UMR Engines www.engineproblem.com.au